
Are you tired of smelling like everyone else? Want to create a fragrance that's uniquely you? Well, you're in luck! Crafting your custom perfume is easier than you might think. In this guide, we'll break it down for you step by step. There is no need for fancy equipment or a chemistry degree – just your creativity and simple ingredients. Let's dive in!
Before we start mixing up magical scents, let's make sure you have everything you need:
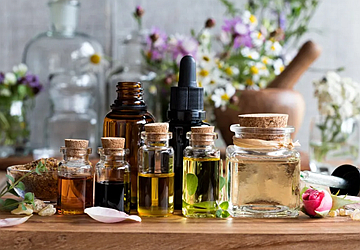
Base Oil: This is like the canvas for your perfume. Common options include jojoba, sweet almond, or fractionated coconut oil.
Essential Oils: These are your fragrance oils. You can choose from various lavender, rose, vanilla, and citrus scents. Make sure they're high-quality and skin-safe.
Glass Perfume Bottle: You'll need a container to store your custom perfume. A small glass bottle with a rollerball or spray top is ideal.
Funnel: To help you pour oils into your bottle without making a mess, a funnel becomes your trusty assistant in perfume-making. This humble tool ensures that no drop of your precious fragrance is wasted.
Measuring Tools: Precision matters greatly in perfume-making, so grab some measuring cups and spoons. These tools are your allies in achieving the perfect blend of scents, allowing you to create a harmonious and well-balanced fragrance, just like a symphony of aromas.
Paper Strips: These humble strips will be your scent testers, your canvases for fragrance strokes. Alternatively, you can also use cotton balls or your wrists as testers.
Before mixing oils, think about what kind of fragrance you want. Do you like floral, fruity, or spicy scents? Maybe you want something fresh and clean. Start by listing the scents you love and the ones you'd rather avoid.
Consider how you want your perfume to make you feel. Should it be calming, invigorating, or sensual? Your emotions play a big role in scent selection.
It's time to get mathematical, but don't worry; it's not complicated. Perfume-making is all about ratios. Here's a basic formula to get you started:
· Base Notes: 40%
· Middle Notes: 30%
· Top Notes: 20%
· Extras: 10%
Let's break these down:
Base Notes: These are the scents that linger the longest. Think of them as the foundation of your perfume. Common base notes include sandalwood, patchouli, and vanilla.
Middle Notes: These are the heart of your fragrance, providing the body and character. Popular middle notes include rose, lavender, and jasmine.
Top Notes: These are the first scents you'll notice when you apply your perfume. They're usually light and fresh, like citrus or mint.
Extras: Here's where you can get creative. Add a twist with a unique scent, like a drop of coffee or a hint of cinnamon.
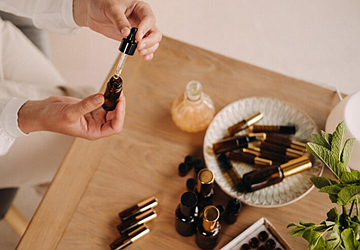
Now comes the fun part: mixing your chosen essential oils. Remember those ratios we talked about? Measure out your base, middle, and top notes accordingly. Use your measuring tools and pour them into a clean glass container.
Start with a small batch to test your scent profile. You can always adjust the formula later.
Once you've combined your oils, seal the container and shake it well. Now, be patient. Let your concoction sit for at least 24 hours. This allows the oils to meld and develop their full potential. The aromas will intermingle during this time, creating a harmonious blend that will elevate your self-care routine.
This waiting game is well worth it, as the longer you wait, the more complex and delightful your DIY perfume will become. So, resist the temptation to rush and let nature work its aromatic magic for the best results.
After the waiting period, it's time to test your creation. Use paper strips or cotton balls to apply a small amount of your perfume. Give it a sniff and see how you like it. Remember, the scent may change slightly on your skin.
If it's not quite right, don't panic. You can tweak your formula by adding more of a particular note or experimenting with different combinations.
Once you're happy with your custom perfume, it's time to transfer it to your glass perfume bottle. Use a funnel to avoid spills, ensuring every drop enters the bottle. Be sure to cap it securely to preserve the fragrance's integrity.
Remember that perfume is sensitive to light and temperature changes, so store your creation in a cool, dark place, away from direct sunlight. Proper storage will help maintain the scent's longevity.
Congratulations! You've just crafted your custom perfume, a scent as unique as you are. Wear it proudly, and revel that you're the only one in the world who smells like this exquisite blend. Embrace the art of experimentation by tweaking your formula to suit different seasons or capture your ever-changing moods.
Perfume-making is a delightful journey of self-expression, so don't hesitate to explore new aromatic horizons and make each day a fragrant adventure.
Let’s now have a look at some additional tips!
Label Your Bottle: This may seem obvious, but you'd be surprised how easy it is to forget what's in that little glass bottle. Label it with the name of your fragrance and the date you made it.
Patience Pays Off: The scent of your perfume may evolve. Give it a few weeks to settle into its final form.
Consider Allergies: If you're gifting your custom perfume, make sure the recipient isn't allergic to any of the essential oils you've used.
Share the Love: Perfume-making can be a fun group activity. Gather some friends and have a scent-styling party!
Crafting your custom perfume is a delightful journey of self-expression. With a few simple supplies and a bit of creativity, you can create a fragrance that's uniquely yours. So, why settle for mass-produced scents when you can have your signature aroma? Give it a try, and embrace the world of personalized perfume. Your olfactory adventure awaits!